Opt-outs
Include opt-out path to customers who want to unsubscribe from your messages
An opt-out is a customer’s preference to stop receiving future messages from your business. Customers can opt out by replying to a text, sending an email, calling your team, or filling out a form on your website. Every message sent should provide a clear opt-out option at the bottom, ensuring users know how to unsubscribe.
Opt-outs can be managed in two ways:
- Within Webex Interact — e.g., replies with opt-out keywords (e.g., STOP) or Interact opt-out form.
- Outside Webex Interact — e.g., phone calls, emails, or external forms.
It may take up to 15 mins for an opt-out to take effect against a campaign/API message.
Opt-outs within Webex Interact
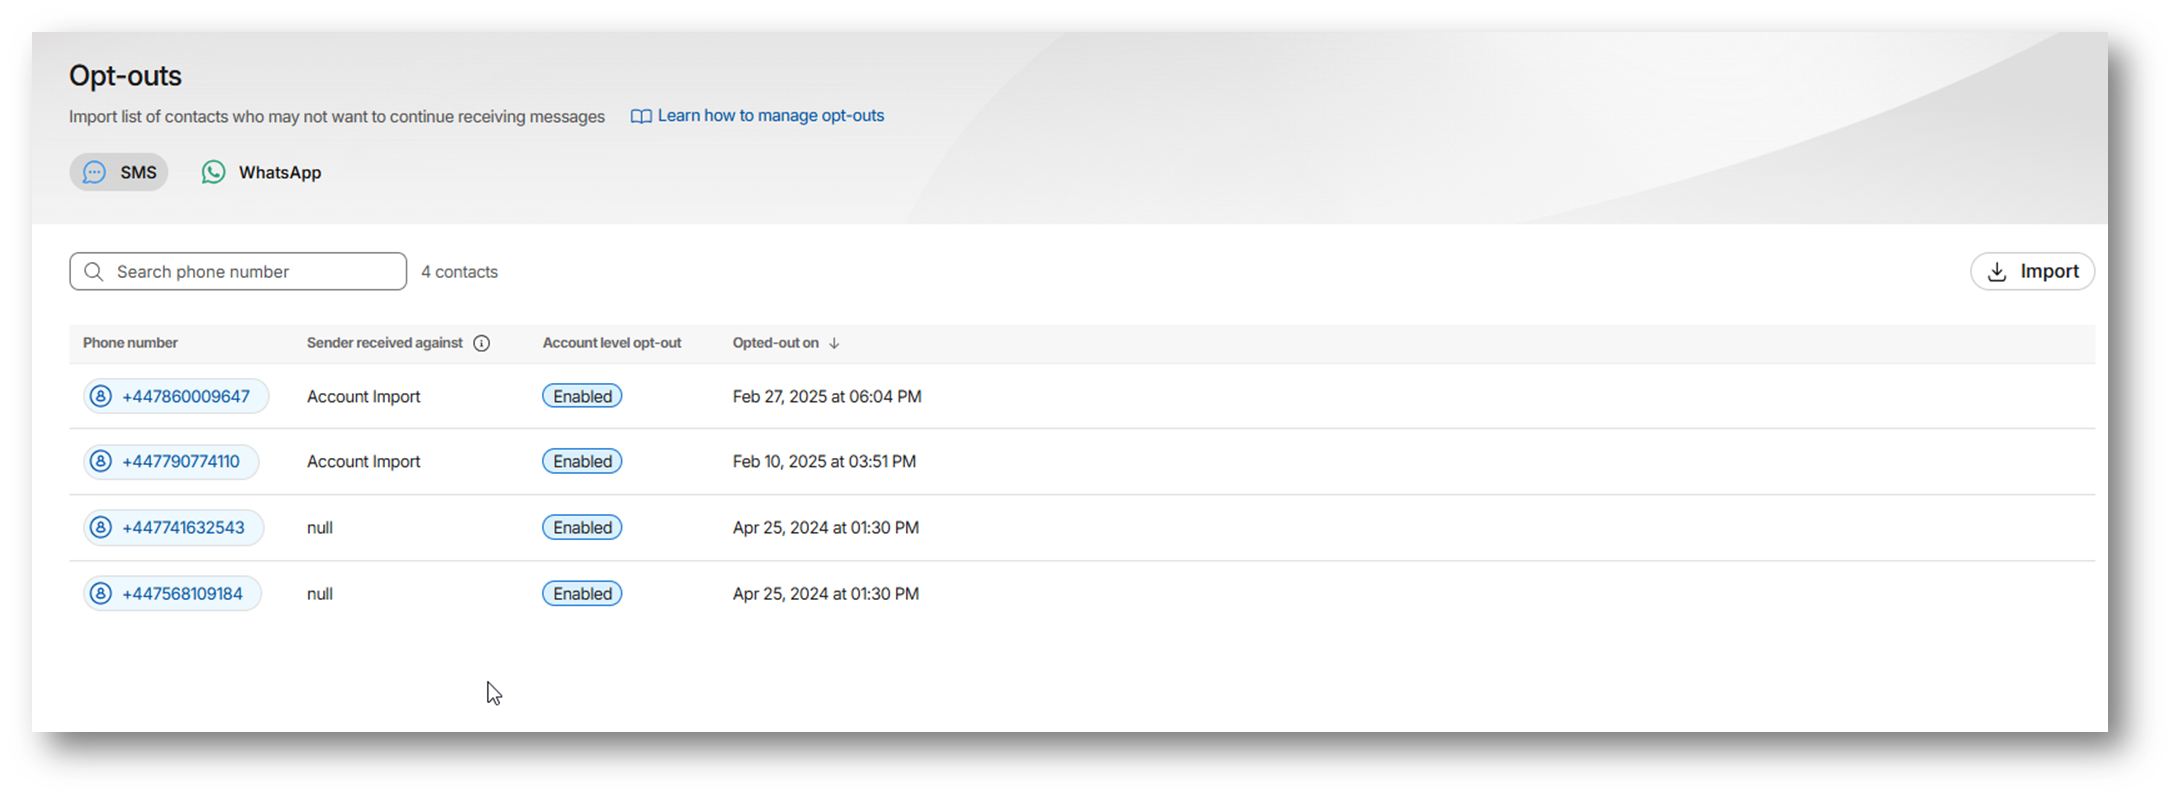
When customers use opt-out features, such as - replying with an opt-out keyword (e.g., STOP) or filling out a Webex Interact opt-out form. These opt-outs are tracked automatically, and added to your opt-out list.
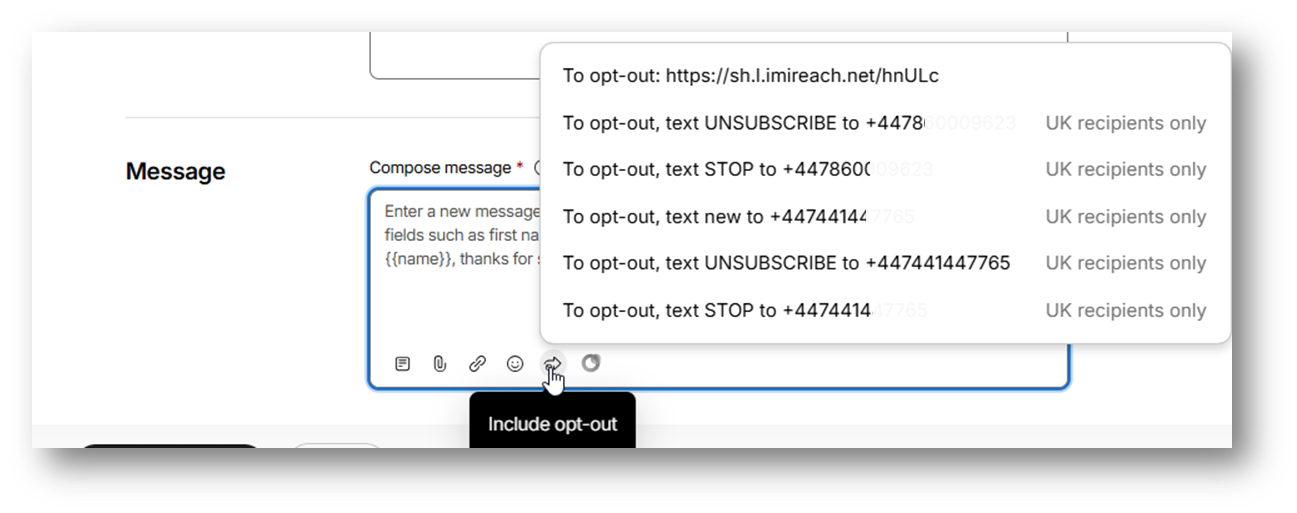
Example message
“To opt-out, text STOP to [your Interact phone number]"_

When a customer opt-outs:
- Customers who replies with an opt-out keyword are added to your opt-out list.
- They won’t receive future campaign messages. [Note: It may take up to 15 mins for an opt-out to take effect against a campaign/API message.]
- Even if you try to send a message to them, Interact will automatically exclude their number during delivery.
You can also send a confirmation to let them know: For example, “You’ve been unsubscribed. You won’t receive more messages.”
Opt-outs outside Webex Interact
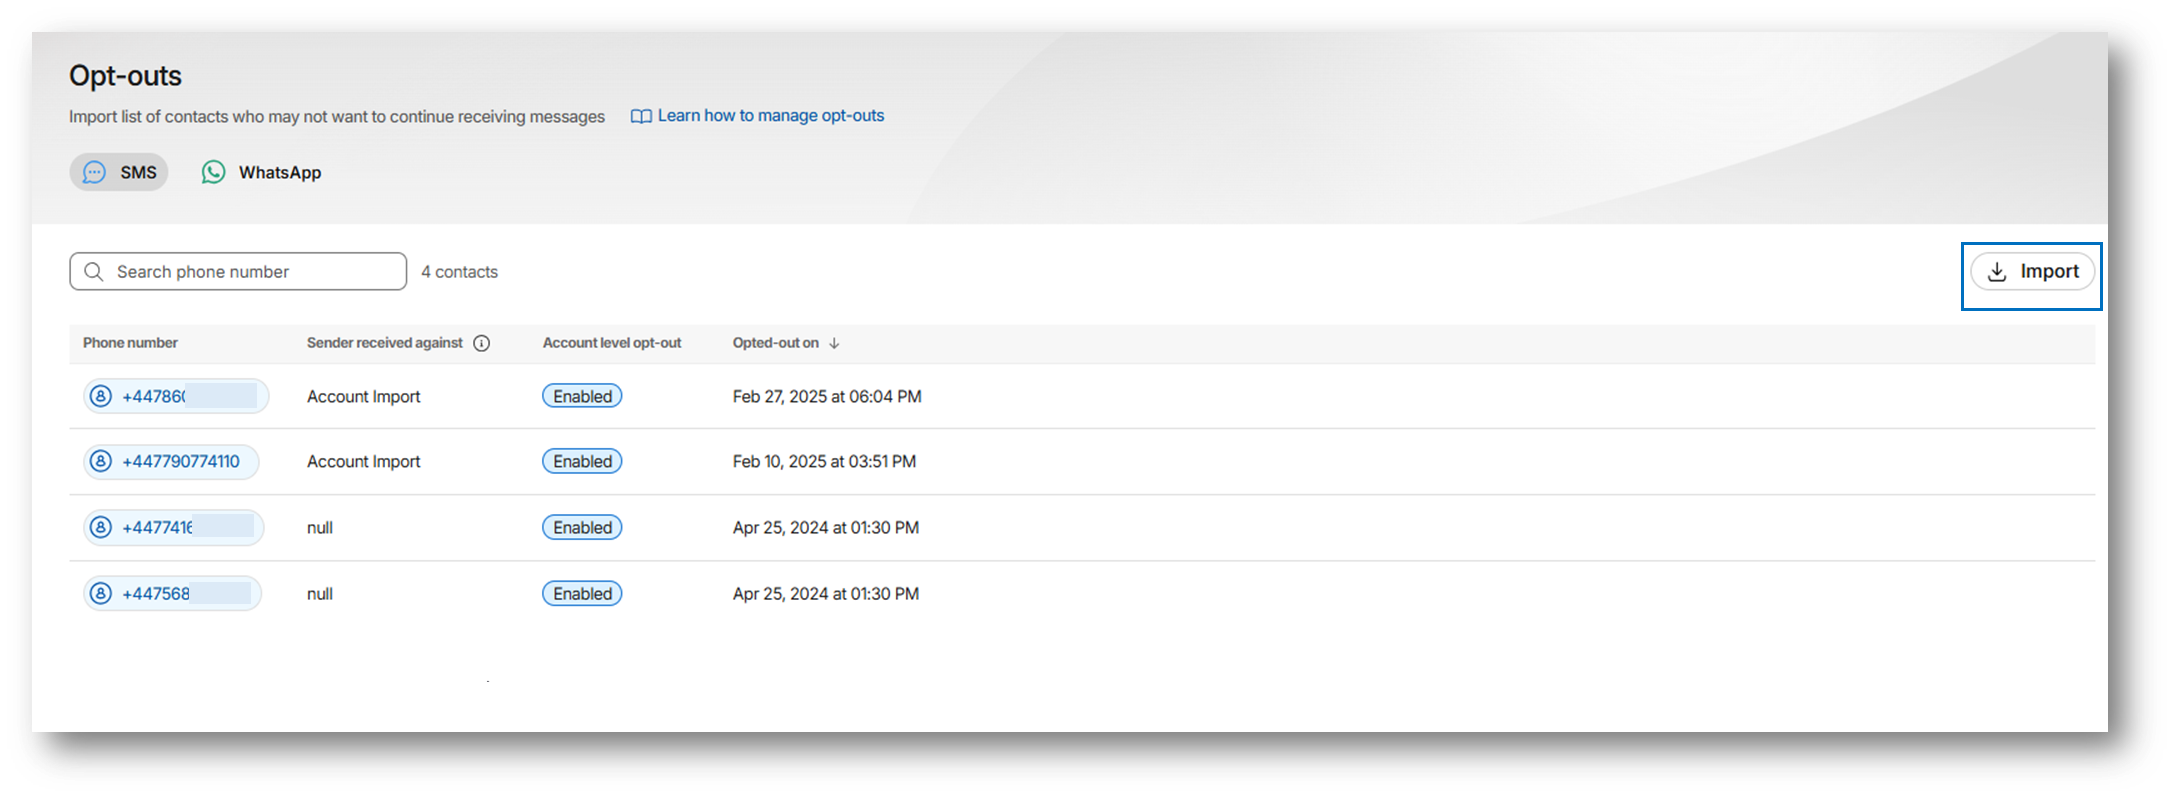
Opt-outs don’t happen over text. When customers opt-outs in other ways—by email, over the phone, or through a external website. These are difficult to track and will not be added to your list. You need to import these contacts to your opt-out list.
For example:
A customer emails you: “Please stop texting me about promos.” In this case, you’ll need to import their number to your opt-out list.
To ensure compliance when customers opts out via a method other than SMS:
- Locate their phone numbers.
- Add or import it into your opt-out list.
- Verify that they are excluded from future campaigns. [Note: It may take up to 15 mins for an opt-out to take effect against a campaign/API message.]
Updated 8 months ago