Contact data mapping
Confirm the names of your column headers
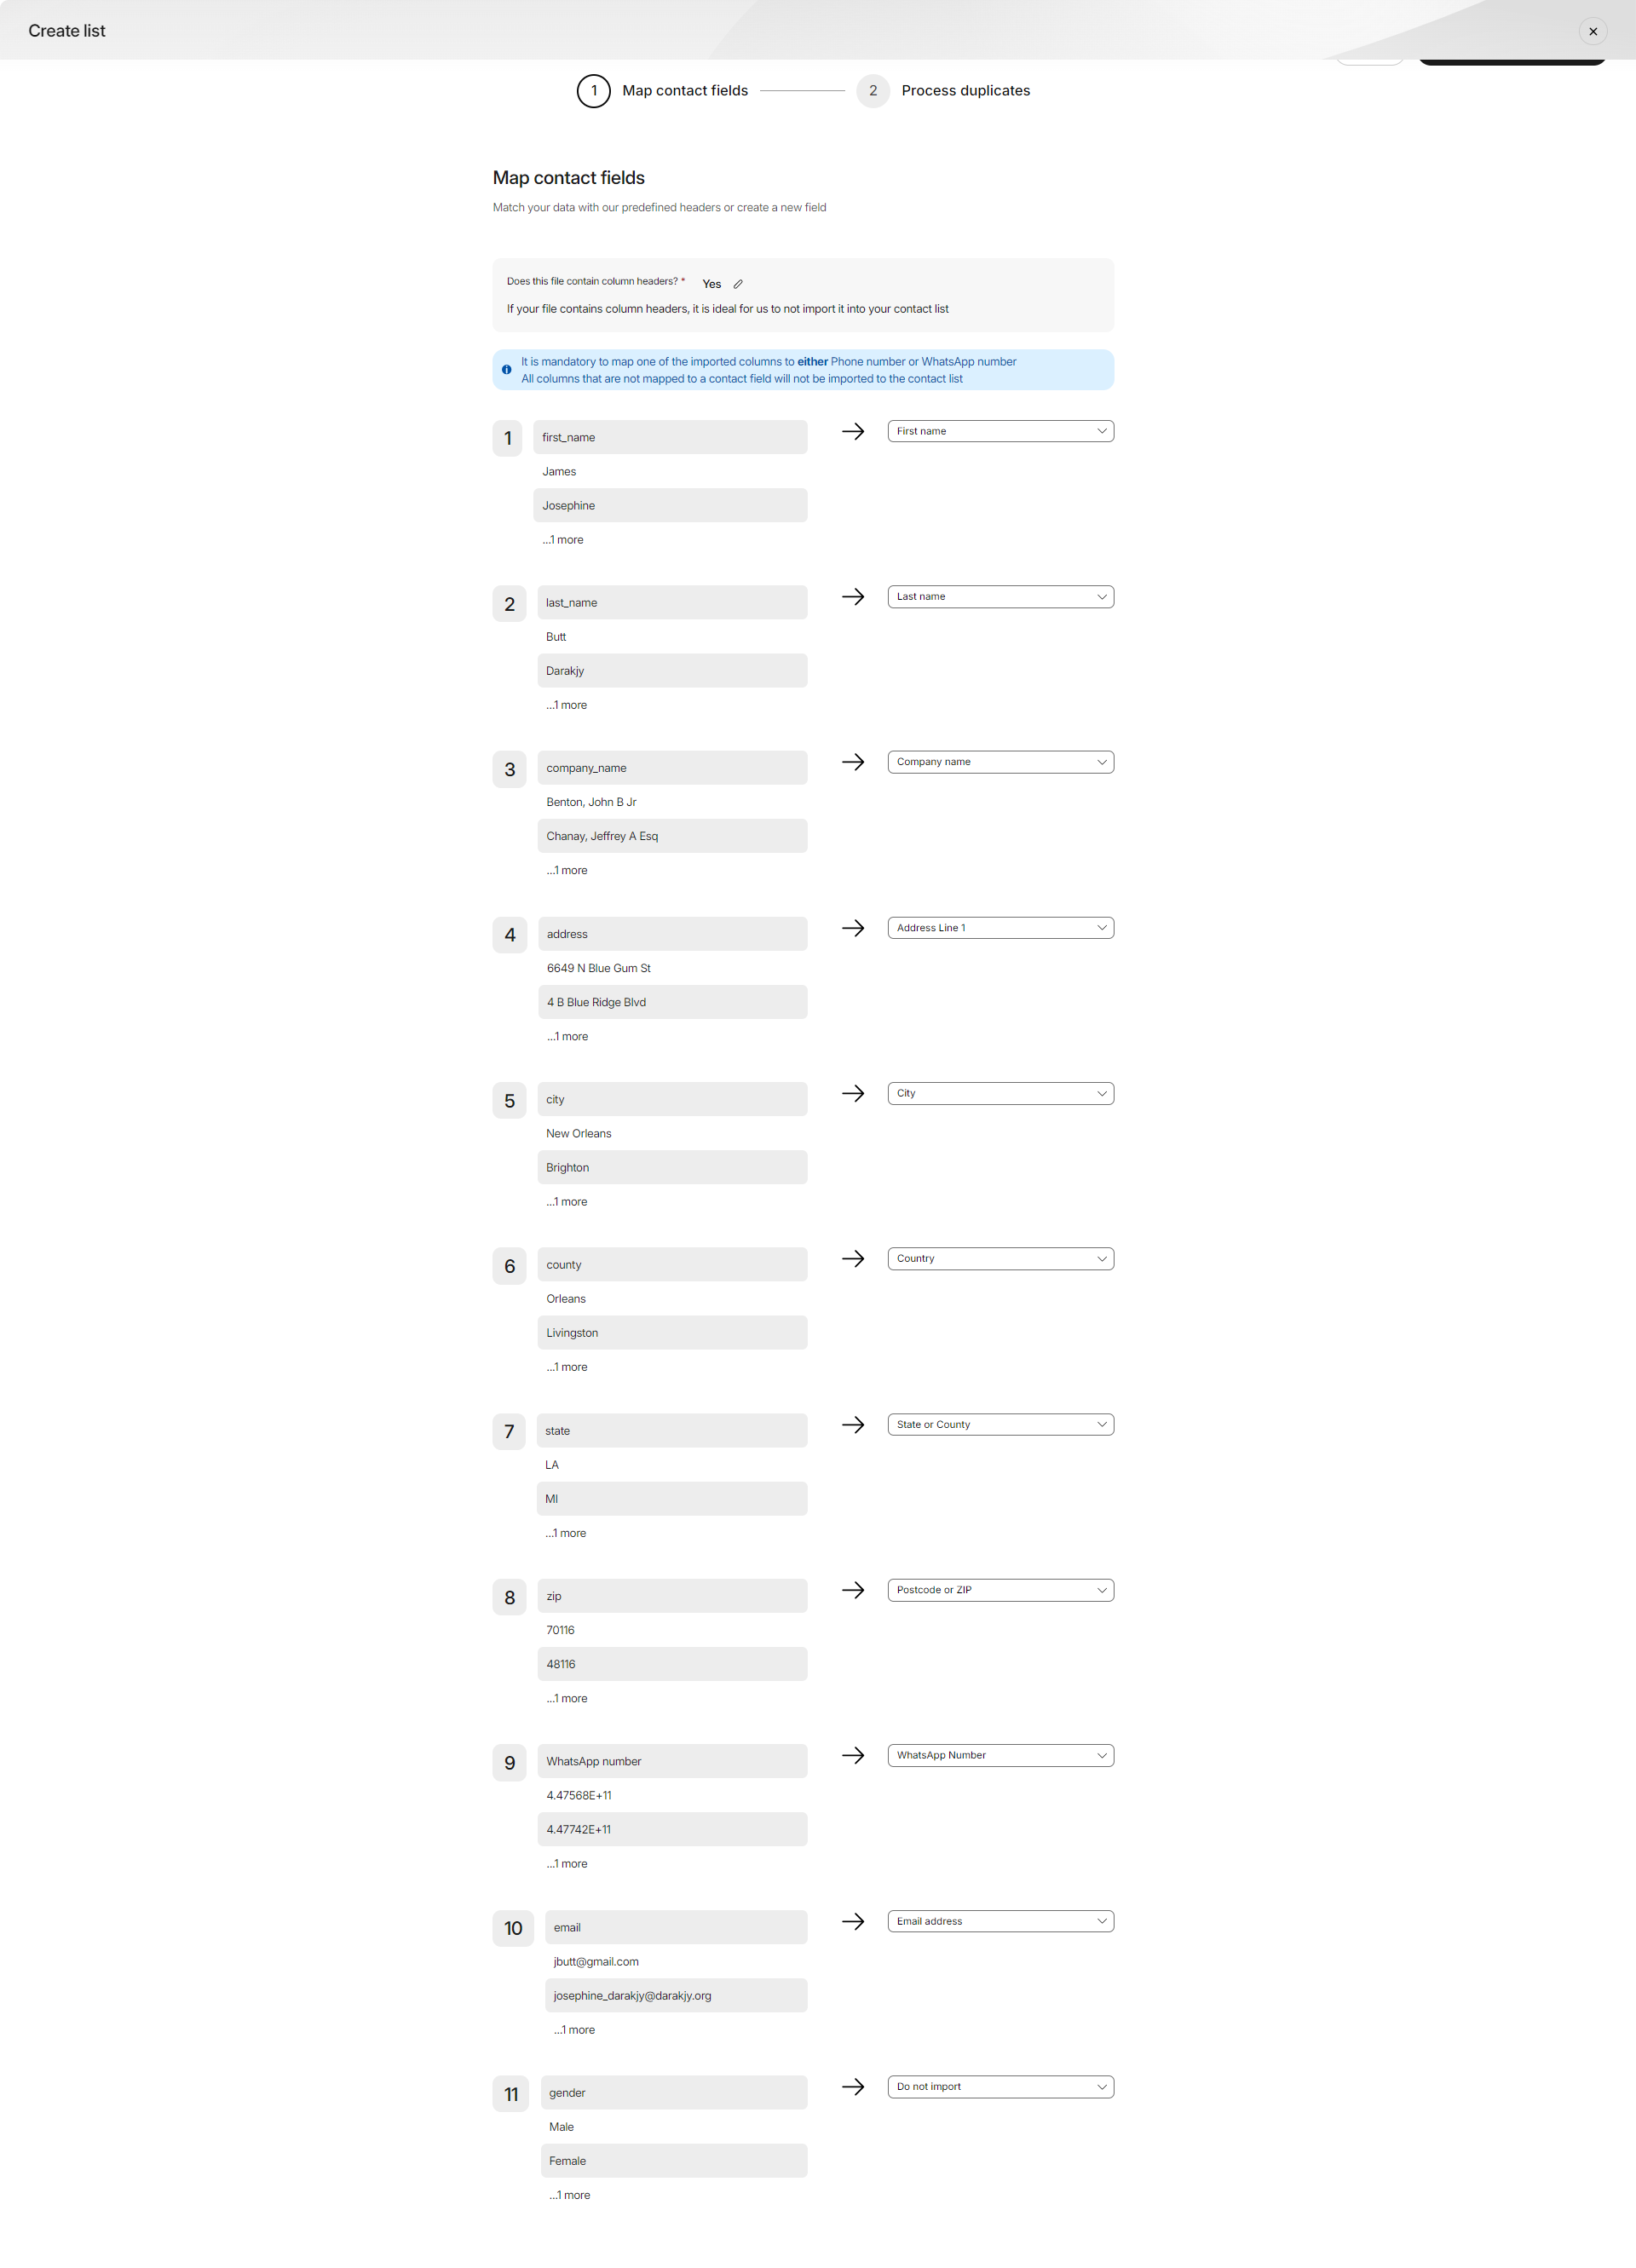
Webex Interact allows you to map specific information you want to collect from your contacts beyond phone numbers such as name, email address, location, age, gender, preferences, purchase history, or any other relevant details. While uploading a list of contacts, you have to map the columns in the uploaded CSV or Excel file to one of the default/custom fields or skip the field during import.
You can map your spreadsheet with the pre-defined fields in Interact. While importing your file, the platform automatically maps certain standard fields like First Name, Last Name, and so on. You can view the fields that are already mapped and match your data with our predefined attributes.
For example, for the data that contains the email address, you can match it with an Email ID. You also have the option to reassign these fields as required. If the desired additional contact attributes are not available, you can also create custom fields. Once you have created the custom fields, you need to map them to the corresponding fields in your contact list.
While importing new contacts via spreadsheet, there are a few things to consider:
- It is recommended to upload the sheet with the data you need and avoid any superfluous data.
- If there are any duplicates, the platform gives you the option to merge, skip or import duplicates.
- If there are any strip spaces and other characters, the platform deletes them from your list.
- If there are multiple Excel tabs within the file, you have the option to select your import data from any tab.

Updated almost 2 years ago