Manage opt-outs within Webex Interact
Webex Interact offers several ways to manage your opt-outs and keep your contact list upto date. Here’s ways to manage opt-outs within Interact:
- SMS opt-out keywords (Default and Custom)
- Free opt-out keyword
- Webform opt-out link
It may take up to 15 mins for an opt-out to take effect against a campaign/API message.
When a customer sends these opt-out keywords/fills out the form, their numbers are added to your opt-out list, ensuring they won't receive future messages.
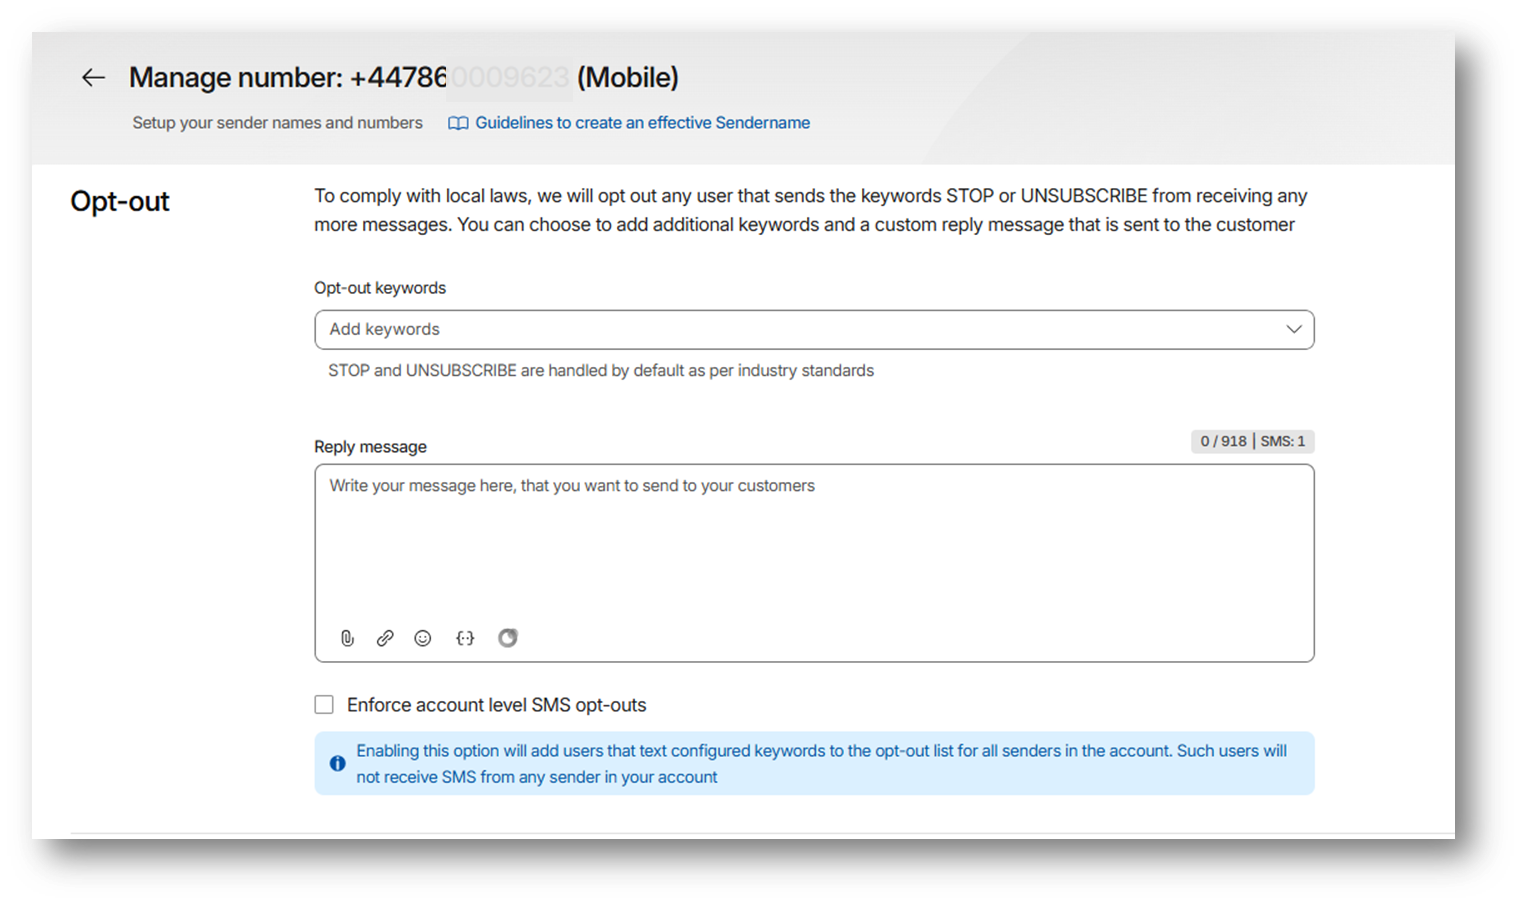
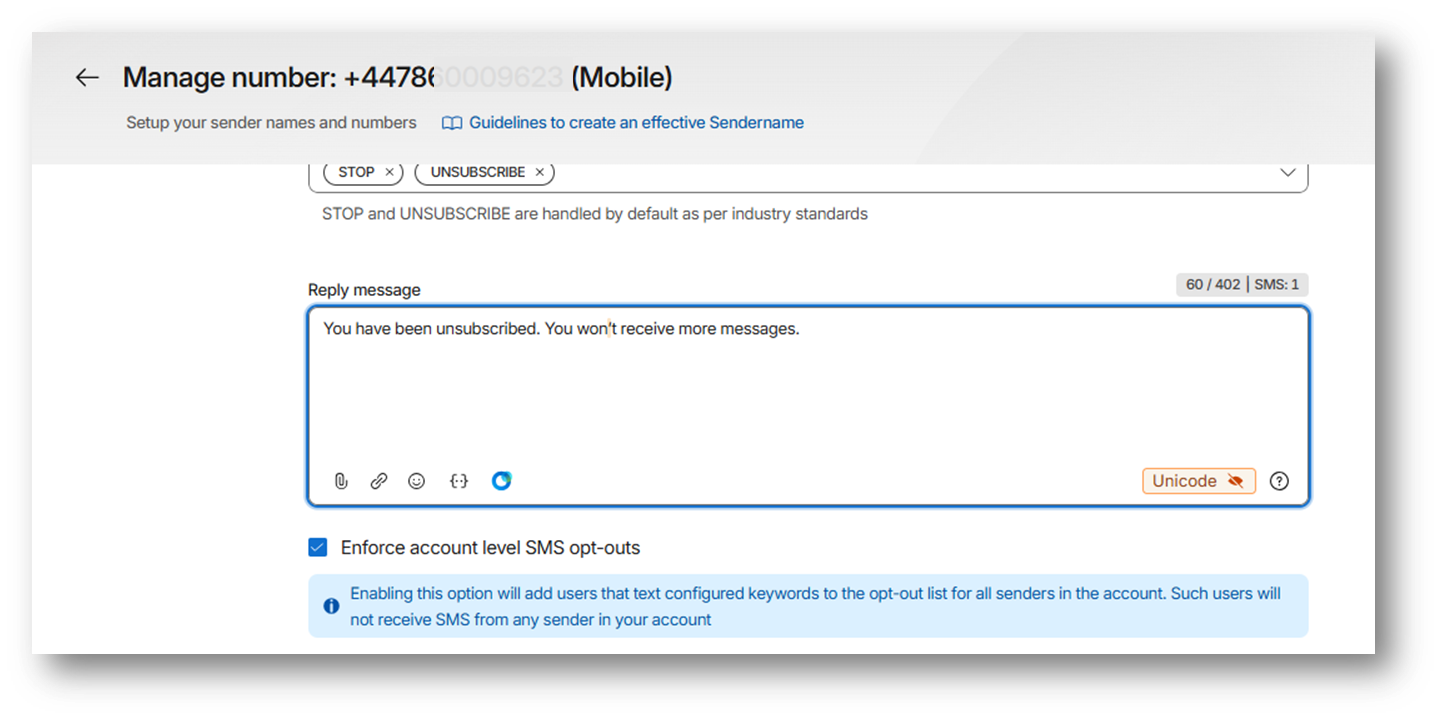
Default opt-out keywords: STOP and UNSUBSCRIBE
To comply with local laws, customers who text STOP or UNSUBSCRIBE are automatically added to your opt-out list and will stop receiving messages.
These keywords are enabled by default on all purchased numbers. To send an automatic response, just add your message in the Reply message textbox on the Manage number page in your Webex Interact account.
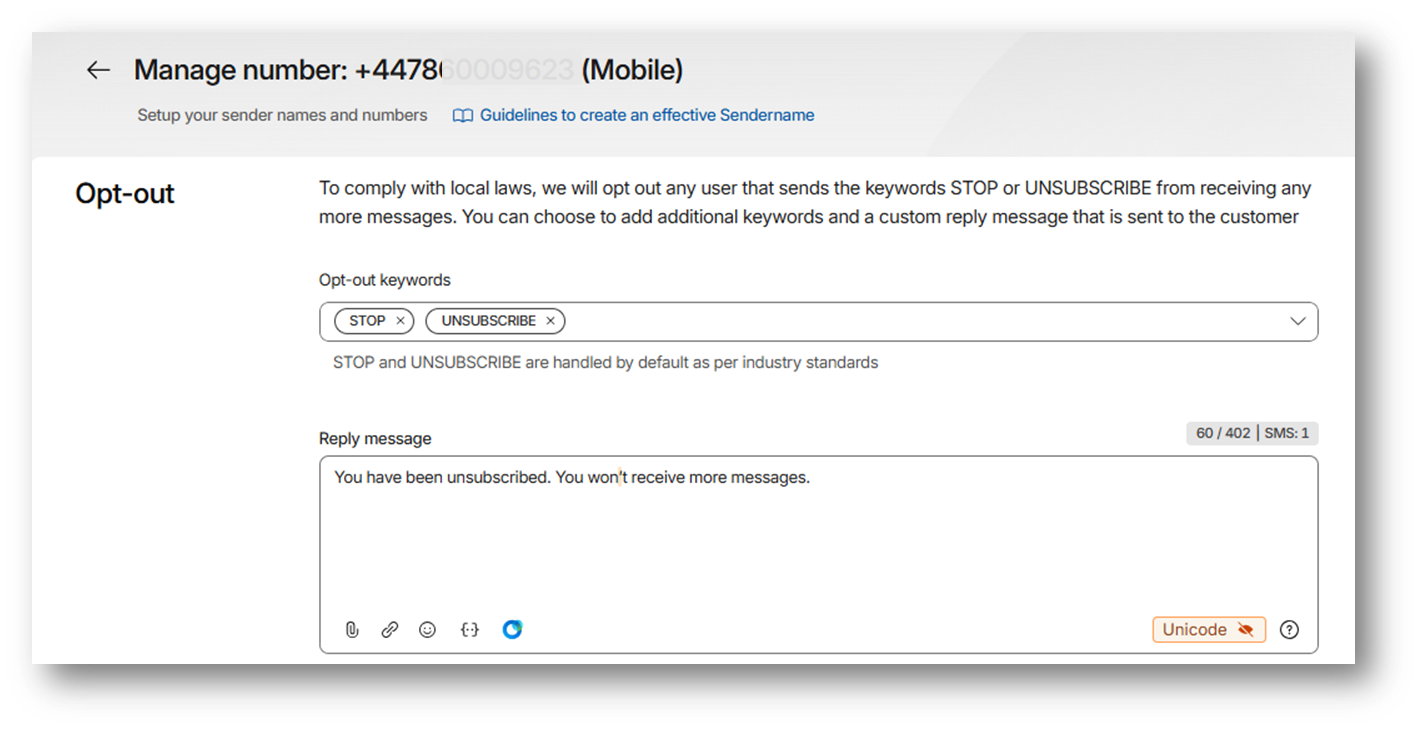
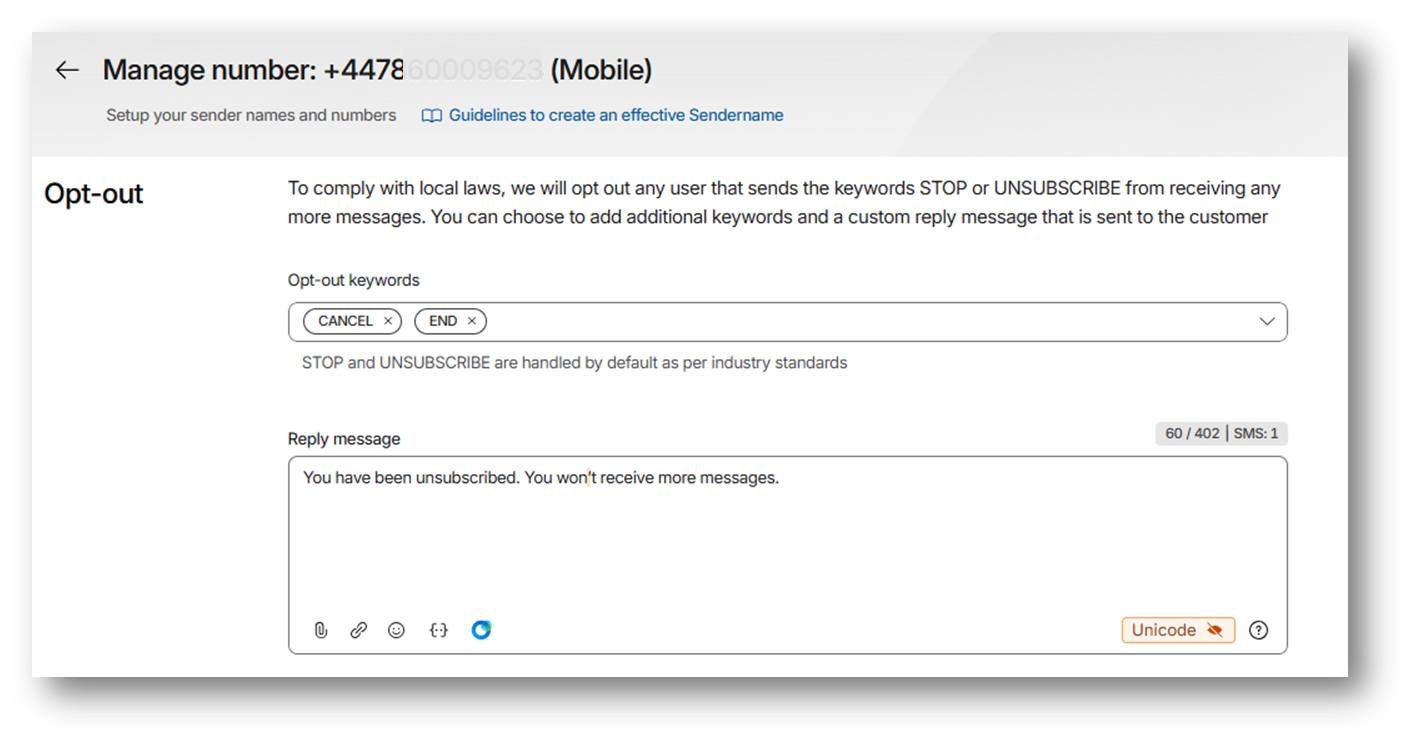
Custom opt-out keywords
If you want to use additional opt-out keywords other than the default ones, you can create them in Opt-out section of Manage number page. For example, you can add custom keywords such as END or CANCEL based on your use case.
To set them up:
- Go to the Manage number page for your purchased number.
- Add your custom keywords to the opt-out section.
- (Optional) Add a custom reply so users know they’ve been unsubscribed.
When customers text END, they are automatically added to your opt-out list and will stop receiving messages.
To send an automatic response, just add your message in the Reply message textbox on the Manage number page.
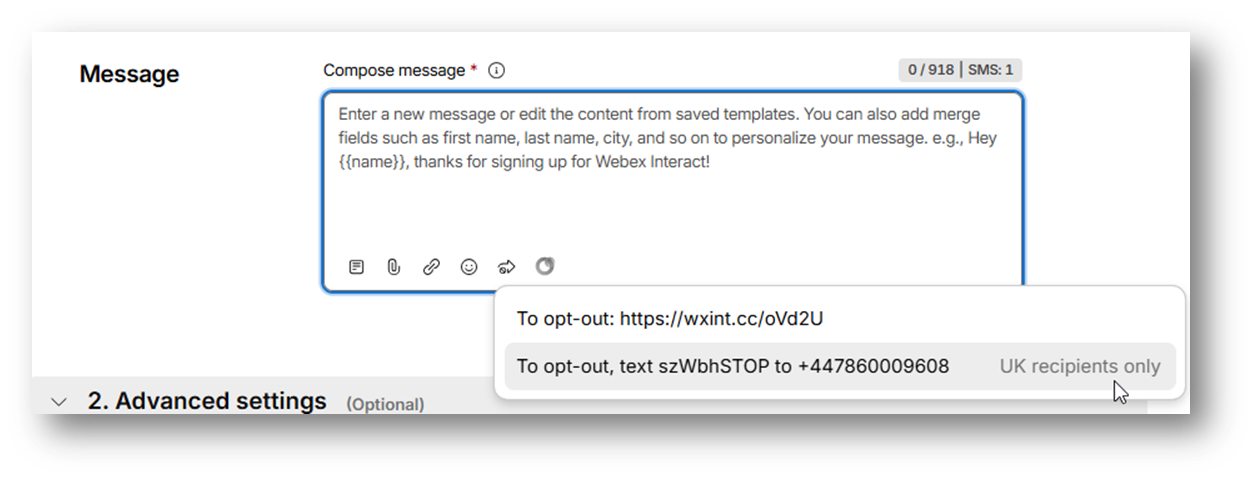
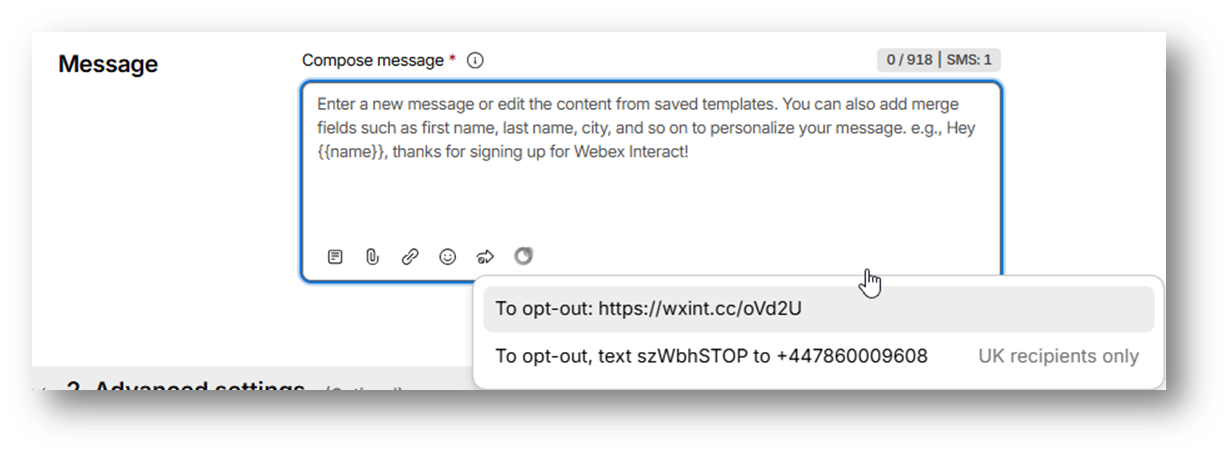
Free SMS opt-out keyword
Each Interact account is given a free opt-out keyword, which is only used for receiving opt-out replies. When a customer texts to number with this opt-out keyword, they are automatically added to your opt-out list.
To add free opt-out keyword:
- Go to your Webex Interact account → Quick send or Create SMS campaign.
- Click the Opt-outs icon in the message compose box.
- Select the opt-out path — "To opt out, text szWbhSTOP to +447860009XXX."
- Add this line to your message and send.
When a user replies with keyword "szWbhSTOP" to "+447860009XXX", the contact is added to your opt-out list
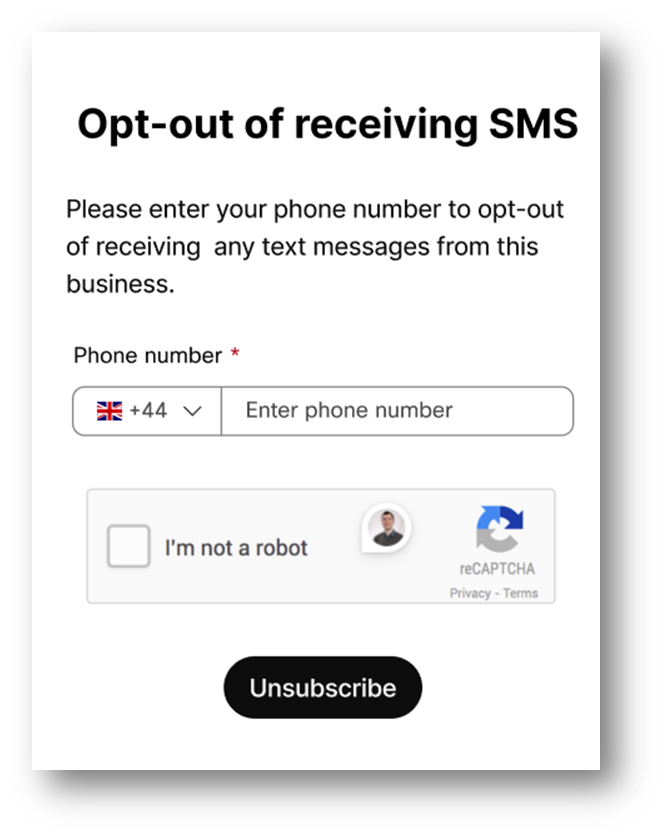
A webform opt-out link
A webform opt-out link allows customers to opt-out of messaging by entering their phone number in a webform and is suitable for international customers who can't text an opt-out keyword. Every account on Interact comes with a webform opt-out link of it's own that can be used in your SMS campaigns. When a customer clicks and fills out the form from an SMS, their number is automatically added to your account's opt-out list.
Note
To prevent entry of phone numbers other than the ones who received an SMS from you, a webform opt-out is tied to an SMS campaign and will throw a "missing valid opt-out key" error if not sent via an SMS campaign on Interact.
To add webform opt-out link:
- Go to your Webex Interact account → Quick send or Create SMS campaign.
- Choose the "Include Opt-out" icon in the compose message textbox
- Choose your opt-out form link- "To opt-out: https://wxint.cc/abcde"
- Add it into your message, and send.
When a user fills out the form, the number is added to your opt-out list.
Account level SMS opt-outs
Account level opt-out is a setting that applies to the entire account—including all numbers and sender names. When this setting is enabled, if a user replies with an opt-out keyword like STOP or UNSUBSCRIBE to any Interact number, their number will be opted out from receiving messages from all senders in your account. You can enable this in the Manage number page for each number.
For example, Account 1 has multiple senders: X, Y, and Z.
When a user sends a "STOP" or "UNSUBSCRIBE" to sender X and if Account level suppression is enabled:
- All senders and numbers associated with Account 1 (including senders Y and Z) will be affected.
- Senders X, Y, and Z will not be able to send messages from your account.
- The opt-out is applied at the account level and all associated senders are restricted.
Updated 8 months ago